


Contents
1. Introductory Matters
2. Characteristics
3. Combat Mechanics
4. The Game Turn
5. Leadership and Organization
6. Vehicles
7. Terrain
1. Introductory Matters
What is this Site?
This is a site for my game-mechanical musings.
My current project is a set of space-fantasy wargame rules. Unless otherwise noted, each post will cover a section of the rules. (Or revisit a rules section I'm updating.) Eventually this will add up to a complete game. When there are enough posts to warrant it, I will make a compilation of the total rules in progress.
I may occasionally take a break and discuss some other topic.
In the course of the rules I may draw examples from worlds familiar to most Sci-Fi gamers and from other games on the market, particularly Warhammer 40k and Flames of War. No challenge to their respective owners is intended.
Scale and Scope
This game is designed for play with 28mm space fantasy models.
It covers games from Platoon to Battalion-sized. I’m assuming most games will be played at around Company size of 100 to 150 models. (A bit bigger than an average Warhammer 40k game.) I’m also assuming bigger is better, and gamers are going to want bigger forces more often than smaller ones.
Therefore the game is designed to be played on a big board. You can use 4’ x 6’ for small games, but you will probably want most games on a 6’x 8’ an 8’ by 8’ table or larger.
Even with a big board, 28mm models are going to be at pretty close range, visually and practically. There won’t be a lot of room for sweeping maneuvers or long-range tank duels. So this is a game of close-in battle. The forces involved are assumed to have already undertaken their preliminary dancing around and have closed in for a ghastly clash. So the length of the battle will be shorter than that represented by a typical Flames of War game (which one can imagine representing a full day of battle) but probably a longer than that represented by a typical game of Warhammer 40k (which one can’t imagine being more than an hour of real combat).
The world represented is space fantasy, where soldiers, creatures and vehicles of wildly varying capabilities clash at rather unrealistic close quarters. Although the combatants possess rapid-firing guns, melee weapons remain viable battle-field options. We will assume that our little soldiers will spend most of the time shooting each other, but a bit of sword-play will happen too. Some creatures will be noticeably tougher, better armored or otherwise superior to human beings, a fact which the mechanics will incorporate. How (and how well) our toy soldiers fight should be as important to the game as their equipment. Skill, leadership and doctrine will all play a major role.
Despite the advanced technology, squads will be organized and maneuver more or less like they did in the second World War. Since tanks are ludicrously huge in 28mm, this will be primarily an infantry game, with armor in support. Since our battlefield will appear quite small from the air, air (and space) power will play a minimal role. We will also include rules for magical or quasi-magical powers.
I may at some point develop lists for use with models from particular universes, but the core rules assume a generic universe.
Conventions and Courtesy
What follows are some conventions I've found work well over the years:
- Players may measure anything on the battlefield at any time.
- Players may declare their intent in any phase (particularly in movement). The other player should respect this intent as best they can as the game progresses. So for example, player might say, "I intend that this unit stay out of Firefight distance"when they are moving. If you get to the Firefight phase, and it turns out one model is an inch over line, then player B should politely allow player A to move their model back so that it stays out of Firefight distance. This rule is designed to prevent acrimony, not permit cheating. If your opponent declares an intent that is clearly impossible, you should say so.
- Models may move a bit more or less than their movement distance if it is necessary for them to stand up properly on terrain, to avoid being knocked off the table, etc. When they shoot or move, players should remember where they "really" are for measuring distances.
- If you can't agree on something, whether a tricky rule, or whether something's in range, then roll off. Higher roller wins the argument. Then, when the game is over, you can work out a dispassionate solution for next time.
- Don't be a dick. The WWPD rule always applies.

The game uses ordinary 6-sided dice. Higher rolls are always better.
No result is ever certain. Sometimes, modifiers may move the target number below 2 or above 6. In this case, it is still possible to succeed or fail. If the target number is 1+ or better, re-roll any 1s. If the re-rolled result is also a 1, the roll fails. If the target number is 7+, re-roll any sixes. If the second result is also a six, it succeeds.
The only exception comes when rolling to-wound an armored vehicle. You cannot harm a buttoned up tank, if you need a 7 or more.
Dice may only ever be re-rolled once.
2. Characteristics
Basic Characteristics
Models are rated by Ranged Skill and Melee Skill:
- A Skill rating of 0 does not bear contemplating. Such incompetents will almost never see the battlefield.
- A poorly-trained unit or force will have Skill ratings of 1. It is typical of conscripts, cultists or militia.
- A typical army will have Skill ratings of 2 across the board. This represents a competent and professional force.
- An elite unit or army will have Skill ratings of 3. (Or maybe just one or the other, depending on its specialization.) This is the highest rating you'll see across a whole army.
- A super-elite unit might have a single Skill rating of 4. This allows us to further differentiate elite armies, giving them an "elite of the elite." You'll probably never see such a rating for a whole army.
Models are also rated by Leadership.
- 6+ Leadership is truly awful. You will only see a 6+ on untrained draftees or civilians.
- 5+ Leadership indicates unmotivated or poorly-led troops.
- 4+ Leadership is typical for a well-motivated and led professional army.
- 3+ Leadership distinguishes highly-motivated, possibly fanatical troops.
- 2+ Leadership goes beyond mere motivation and into the realm of non-human psychology. Such troops are mighty heroes, insane berserkers, will-less robots, or mind-controlled insects.
- Toughness. The model is tougher than a standard human.
- Armor. The model wears personal armor that may deflect or absorb damage.
Infantry models without special characteristics may be assumed to be human-equivalent, and wearing no appreciable body armor.
Weapons
Weapons are defined by several characteristics.
All ranged weapons have:
- Range
- Rate of Fire
- Massive. Massive weapons negate Toughness.
- Armor Piercing. Armor Piercing weapons negate Armor worn by infantry.
- High Explosive: High Explosive weapons negate Cover Saves.
- Anti-Tank: Anti-Tank weapons may damage Vehicles.
Melee equipment grants:
- Rate of Attacks
- Anti-Tank: Anti-Tank weapons may damage Vehicles.
- Melee Defense. Increases the Save in Melee.
- Melee Offense. Decreases the Save in Melee.
- Massive. Massive weapons negate Toughness.
- Armor Piercing. Armor Piercing weapons negate Armor worn by infantry.
3. Combat Mechanics
To Hit
The same mechanic is used in Shooting, Firefight and Melee.
Roll a number of dice equal to the Rate of Fire or Rate of Attacks for each model.
The basic number needed to hit is 4+.
Attacker and defender compare relative skill. If the Attacker is greater, reduce the difficulty by 1 per level of skill difference. If the Defender is better, increase the difficulty by 1 per level of skill difference.
Modifiers apply in Shooting and Firefight:
- If the target is Concealed, increase the difficulty by 1.
- If the target is Cowering, increase the difficulty by 1.
- Models that are Cowering or Suppressed will suffer a penalty to hit of -2.
- Models that moved in the previous Movement phase suffer a to hit penalty of -1 with their small arms. Certain heavy weapons may suffer a -2 penalty or be unable to fire at all.
Allocation of Hits
Once the attacking unit has rolled to-Hit, the defending player must allocate each Hit to a model in the target unit.
The defending player must allocate the Hits using the following criteria, in order of priority.
In Shooting and Firefight:
- The model must be in range and line of sight of the firing weapon.
- If the weapon permits the attacker to single out a target model, that model must take all hits from the weapon.
- Hits must be evenly distributed. So each model in range must take 1 hit before any model may take 2, and each model in range must take 2 before any model takes 3, etc.
- If the weapon permits the attacker to designate a particular target type, the hit must be taken against a preferred target type before against any other. (This is relevant to certain heavy weapons.)
- Hits must be taken on models within 2" of the attacker.
- Hits must be evenly distributed. So each model in range must take 1 hit before any model may take 2, and each model in range must take 2 before any model takes 3, etc.
- Hits must be taken on a models in base contact with the attacking model before being taken on a model within 2".
In some cases, you may be able to fast-roll the Wounds and Saves for multiple Hits at the same time, but you may only do so if you and your opponent agree that it won't make a substantial difference.
To Wound
For each Hit, roll a die to-Wound the model.
The basic number needed to-Wound is a 2+.
The to-Wound roll is subject to modifiers:
- If the model has Armor or Toughness, then the difficulty increases by 1 for each level of Toughness and/or Armor.
- If the attacker has a Massive weapon, then reduce Toughness for each level of Massive.
- If the attacker has an AP weapon, then reduce Armor by each level of AP.
- Once Toughness or Armor is reduced to 0, neither Massive nor AP have any additional effect.
Models also receive a Save. In Shooting and Firefight, this Save is called a Cover Save. In Melee, it is called a Defensive Save.
A Cover Save represents a model’s ability to interpose obstacles or the earth between itself and incoming fire. Game models are almost always depicted standing upright, brandishing their weapons, but we may assume actual soldiers will often be crouching, ducking, or crawling.
- In the Shooting Phase, the basic Cover Save is 3+.
- In the Firefight Phase, the basic Cover Save is 5+.
- A target in Soft Cover gains +1 to their Cover Save.
- A target in Hard Cover gains +2 to their Cover Save.
- A target that is Cowering gains +1 to the Cover Save.
The High Explosive trait reduces Cover Saves. Each level of HE reduces the Cover Save by 1. This even effects the basic Save. So a Good HE weapon can remove Cover Saves altogether.
In Melee, models may receive a Defensive Save. This Save represents the model dodging or parrying or perhaps weirder stuff like force-fields or magic. The basic Defensive Save is 5+. Certain traits may increase or decrease the Defensive Save.
Suppression
A unit is Suppressed if in any single Phase, it takes a number of Wounds equal to HALF (round up) of the number of models it contains. This is checked before any casualties are removed or Cover Saves are rolled.
A Suppressed unit fights less effectively.
- It fires at -2 to-Hit in the Shooting and Firefight phases.
- A Suppressed unit may not charge into Assault. Once in assault, it fights normally.
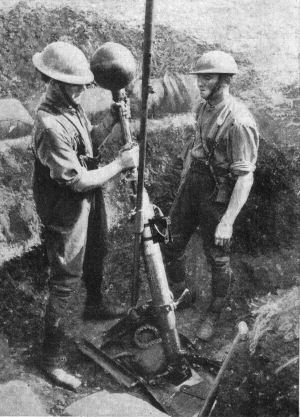
| "Hmmm. Did I hit that guy or not?" |
Some weapons fire a Template, which will be noted in their rules.
Templates may be of the following sizes. It doesn't matter if you use round templates or square ones as long as you are consistent.
- Small: Use the GW small blast template or equivalent. It will usually cover only two or three moderately-spaced models. It represents things like grenades.
- Medium: Use the FoW 6"x6" template or the GW large blast template or the equivalent. It will usually cover six to eight moderately-spaced models. It represents mortar barrages and the HE shells of tanks.
- Large: Use the FoW 12" x 12" template, the GW Apocalypse, or the equivalent. It represents barrages from field artillery or the HE of enormous direct-fire guns.
In order to fire a template, the controller of the shooting unit must nominate a target model in range and line of site. Place the center of the template over the target model.
Templates must normally be placed with their longest dimension on a line perpendicular to the direction of fire. (Any exceptions will be noted in the weapon's rules.) This is of course irrelevant for circular templates, which have no particular direction of orientation.
If the firing unit contains of multiple template weapons, each template may be placed on different models.
Alternatively, a battery of identical weapons in the target unit may fire together. If fired in this manner, all the templates must be placed touching or overlapping so that both templates lie along a line running perpendicular to the direction of fire and crossing the target model. The longest dimension of all templates must align centrally with the same line. The target model must be in the approximate center of the line of templates. (This sounds complicated but it basically means make a T. The target model is the cross of the T, and the top is the two templates.)
Count the number of models from each unit under each template or templates (friend or foe). A model is under a template if any portion of its base (or hull) is under the template, but not if the template only covers a protruding arm or a gun barrel or some such. If a model is under more than one template, then it is counted multiple times -- once for each template that covers it.
Then roll to hit for any units, using an RoF equal to the total number of models covered in it, based on this count. Use normal modifiers. The owner of any units struck assigns hits normally, with the exception that all hits must be assigned only to models under the template or templates.
If the template covers friendly models, then the firing unit must immediately roll Leadership. If they fail, they become Suppressed, as they try to correct whatever error led to friendly fire.
Line of Sight and Indirect Fire
 |
| "Are you sure this silly looking thing will work?" |
Many indirect fire weapons use a Spotter. The Spotter is a model or models associated with the weapon. It always moves as a separate unit from its parent. The firing unit may trace line of sight from the Spotter when firing at a target.
Most indirect fire weapons are terrifying explosive weapons. They usually cause more Suppression than normal firing. This will be indicated as Suppression X, where X is a multiplier applied to the number of wounds inflicted for purposes of determining Suppression. So for a Suppression 3 weapon, each Wound inflicted counts as 3 Wounds for counting Suppression only.
Many indirect fire weapons, such as artillery, are too clumsy (or dangerous) to fire in the Firefight phase. These have the No Firefight rule. They may only be fired in the Shooting phase.
Other indirect fire weapons, such as grenades, are so short-ranged as to only be useful in the Firefight phase. These have the Firefight Only rule. They may only be fired in the Firefight phase.
4. The Game Turn
Turns and Phases
Turns
Turns are I-Go, U-Go.
Phases
Each turn has four phases:
- Movement
- Shooting. For all shooting over 12”. Only the active player shoots.
- Firefight. For all shooting within 12”. Both players shoot. Cover saves are worse than at range.
- Melee. Unpinned units within range may charge into melee and fight. Both players fight.
At the beginning of a player's turn, any unit that is Suppressed may make a Leadership test. If it passes, then it is no longer suppressed. It may then act normally.
Movement Phase
Standard Infantry will move 6" per phase. Terrain will not slow them, but some terrain may be impassible.
Infantry has a coherence distance of 2" between models. Models in coherency distance of the leader or incoherency with a unit model in coherency distance with the leader are said to be in coherency. Models out of coherency must move into or directly towards coherency or remain stationary.
Standard Vehicles will move 12" per phase. Terrain will slow them to 6" per phase. Difficult Terrain requires a test on 2+ to avoid becoming Immobilized. Very Difficult Terrain will require a test on 4+ to avoid becoming Immobilized. Different types of Vehicles may move a different speeds.
Models may move at double speed, provided they do not come within Firefight distance (12") of an enemy model . Models that have moved at double speed suffer the following penalties till their next turn:
- May not shoot in the Shooting Phase.
- Count as Suppressed in the Firefight Phase.
- Suffer -2 to their Cover Saves.
The player whose turn it is selects a unit to shoot.
Each model in the unit may select a different target.
Targets must be within range and line of site of the shooting model.
Models may not normally shoot through friendly models. However, a friendly model may voluntarily forgo shooting in order to allow another friendly model to trace line of sight though its base. We will call this Lying Down.
Models may shoot through enemy models, provided line of sight is not completely obscured. The target models will count as being concealed and in soft cover.
Models within Firefight distance of an enemy may not shoot in the shooting phase. (They will shoot in the firefight phase.) They may not Lie Down in the Shooting Phase.
All shooting is resolved one friendly unit at a time.
At the end of the Shooting phase, apply Suppression and test Leadership for all relevant units, friend or foe.
Firefight Phase
In the Firefight phase, all models within 6"of an enemy model have an opportunity to fire.
Divide the board into individual Firefights. A Firefight contains all opposing units what have a model within 12" of each other or any other enemy unit. A Firefight may thus daisy chain many units. If A is in range of B, and B is in range of C, then A B and C are all in one Firefight. You may find that you have one giant Firefight across the whole board, or you may find you have several small Firefights, each having only two units. Either is fine; we are only dividing them up for ease of resolution.
The player whose turn it is chooses the order in which to resolve each Firefight. (Again this should make no difference to the outcome; it's just courtesy.)
All shooting in the Firefight is assumed to occur simultaneously. Each player rolls To-hit for their models involved in the Firefight. Both players then allocate hits. Each player should roll To-Wound. Finally, the players roll Saves for their models. If there's any dispute over who rolls dice first, defer to the player whose turn it is. It should make no difference to the outcome anyway.
You may be able to to simplify the dice rolling by combining rolls or stages, but you should only do this if you and your opponent agree.
At the end of the Firefight phase, test Leadership for units that are eligible to Break and apply Suppression for all relevant units, friend or foe.
Melee Phase
At the start of the Melee phase, the player whose turn it is declares which of his units wish to Charge.
The player then moves the models in his Charging unit.
The closest Charging model may move up to 6" towards the nearest unengaged enemy model. Then the next closest, etc. If all enemy models in range are engaged, then the charging model must try to reach base to base contact with a friendly model engaged in melee. Continue until all models have moved.
The opposing player now must Pile In. He moves any his models within 8". They must move towards enemy models in the same fashion as above. Only units with engaged models may so move into Melee. (So it doesn't pull in units farther away.) They may move even if they fired in the Firefight phase.
Divide the board into individual Melee. A Melee contains all opposing units that have a models engaged with each other or any other enemy unit. A Melee may thus daisy chain many units. If A is in Melee of B, and B is in Melee of C, then A B and C are all in one Melee . You may find that you have one giant Melee across the whole board, or you may find you have several small Melee, each having only two units. Either is fine; we are only dividing them up for ease of resolution.
The player whose turn it is chooses the order in which to resolve each Melee. (Again this should make no difference to the outcome; it's just courtesy.)
All hits and wounds in the Melee is assumed to occur simultaneously. Each player rolls To-hit for their models involved in the Melee. Both players then allocate hits. Each player should roll To-Wound. Finally, the players roll Saves for their models. If there's any dispute over who rolls dice first, defer to the player whose turn it is. It should make no difference to the outcome anyway.
You may be able to to simplify the dice rolling by combining rolls or stages, but you should only do this if you and your opponent agree.
At the end of the Melee phase, test Leadership for units that are eligible to Break.
Moreover, test Leadership for any Suppressed unit that was engaged in either Firefight or Melee in this player's turn. If they fail, they must Fall Back. If they succeed, they may chose to remain where they are or they may voluntarily Fall Back. Units that remain in Melee must make a Pile In move as described above, bringing as many more models as possible into base to base contact. Units which fought in Melee in this players turn, but are no now longer engaged in Melee may make a Follow Up move. Resolve Fall Back before Pile In Before Follow Up.
A unit that Falls Back makes an immediate normal move directly away from as many enemy models as possible, ending as far away as possible.
A unit that Follows Up makes an immediate normal move in any direction. However, its models may not end closer to any enemy models.
5. Leadership and Organization
Leaders
Every army has a chain of command. Certain models in your army are Leaders. Leader models are associated with a particular level of the army’s command structure. Typically, this runs:
- CiC of the Force
- Battalion Leader(s)
- Company Leader(s)
- Platoon Leader(s)
- Squad Leader(s)
- Team Leader(s)
A Unit is a group of Models that must maintain Coherency and which maneuvers separately . It may be at any level of the command structure, but is usually a Squad. Bigger armies, with poor command and control, may have Platoon or Company-Sized units.
A Unit leader is the integral Leader model for a Unit. Every Unit has a Unit Leader and cannot be without one. If the Unit Leader dies, another model immediately becomes the new Leader. This must the next highest ranked model in the Unit, if the Model can be discerned by equipment or markings. Otherwise, any model in the Unit may be designated.
Independent Leaders are not part of a Unit, but are able to roam freely about the battlefield as lone Models.
Special Leaders have Doctrines that only they may activate or confer on nearby Units. These Doctrines represent that specific Model's abilities. If that Model dies, the special Doctrines are lost with it. The Special Leader may also be a Unit leader. If a Special Unit Leader dies, the new Unit Leader may only use Doctrines associated with the Unit itself. It does not inherit a slain Special Leader's Doctrines.
Force Organization
Attachments and Assignments
With many weapons, the player has a choice whether to deploy them as separate units, or to attach them to other squads in the chain of command. (At the start of the game.) We will use the term attach to mean that the weapons leave their original unit and become a part of their new unit for all purposes for the rest of the game.
We will use the term assign to indicate that these units are temporarily a part of a Leader's chain of command. Usually they will fall directly under the force's leader, but a Lieutenant-Colonel, a Captain or a Lieutenant may have the opportunity to further assign an asset farther down the chain of command.
Assigned assets may also sometimes be attached to a unit. For example, a Captain may attach some HMGs to a particular squad.
Core and Support
We will divide our units into two types. Those that are a normal part of the formation will be called Core. Those that come from elsewhere we will call Support.
 Each level of force (Platoon, Company and Battalion) will
automatically include any integral assets for that level as part of its Core. It will also have a list of external Support choices
that it can take. This list will always include choices from
immediately above it in the chain of command, as well as other choices
from father away. The number of choices and the variety of equipment
will increase at each level.
Each level of force (Platoon, Company and Battalion) will
automatically include any integral assets for that level as part of its Core. It will also have a list of external Support choices
that it can take. This list will always include choices from
immediately above it in the chain of command, as well as other choices
from father away. The number of choices and the variety of equipment
will increase at each level. When building a force, you may only choose Support Choices from the highest level of your command. For example, a Battalion level force chooses from the Battalion Support Choices. It may NOT also make selections from the list of Company Support Choices or Platoon Support Choices for each of its Companies and Platoons. The Battalion Support Choices include all total available Support for the force. If the Battalion leader wants one of his Companies to have some support, he will have to assign it downward to his subordinates.
Leadership Tests
A Leadership test is (simply) a roll against the Leadership score, expressed between 2+ and 6+. If the roll is equal to or higher than the target, the Leadership test is passed. Otherwise, it fails.
When testing against a unit, always roll against the highest Leadership in a unit.
When testing against a force's Leadership, use the Leadership score of the highest ranking (surviving) figure. If there are several equally-ranked figures, the rolling player may choose any one of them.
Make any needed Break tests from the lowest point(s) in the chain of command and work your way up.
Unit Break Tests
The most common form of Leadership test is the Break Test.
A unit must make a Break Test under the following circumstances:
1) If the unit falls below 50% of its starting strength in any phase.
2) If already below 50% of its starting strength, the unit takes a further casualty in any phase.
The unit must make a Break Test at the end of the phase. Sometimes, it the Unit may use a Doctrine to re-roll or ignore the result,. If it fails the roll, and/or any re-rolls to which it is entitled, and cannot otherwise ignore the result, it is removed from play.
Command Break Tests
If a command of several units takes enough casualties, then its whole structure may unravel. We will define a command as any units under a single leader at the start of the game. These will usually be Platoons and Companies, or their equivalent.
A command must take a Break Test under the following circumstances:
1) If his command falls below 50% of its starting units (not including Independant single-model Leaders) in any phase.
2) If already below 50% of its starting strength, it loses another unit in any phase.
The command must make a Break Test at the end of the phase. When testing against a command's Leadership, use the Leadership score of the highest ranking (surviving) figure. If there are several equally-ranked figures, the rolling player may choose. Sometimes, the command may use a Doctrine to re-roll or ignore the result. If it fails the roll, and/or any re-rolls to which it is entitled, and cannot otherwise ignore the result, the entire force decides it can no longer continue to fight. Remove the entire command from the board.
Force Break Tests
Your force as a whole may need to take a Break Test, too.
A force a unit must make a Break Test under the following circumstances:
1) If the force falls below 50% of its starting units (not including Independant single-model Leaders) in any phase.
2) If already below 50% of its starting strength, it loses another unit in any phase.
The force must make a Break Test at the end of the phase. When testing against a force's Leadership, use the Leadership score of the highest ranking (surviving) figure. If there are several equally-ranked figures, the rolling player may choose. Sometimes, the Force may use a Doctrine to re-roll or ignore the result. If it fails the roll, and/or any re-rolls to which it is entitled, and cannot otherwise ignore the result, the entire force decides it can no longer continue to fight. Remove the entire force from the board. You lose.
Doctrines
Each force will have Doctrines, which represent aspects of their equipment and training. Some Doctrines will apply to the entire force. Other doctrines may be specific to a particular unit. Special Leader models may also have Doctrines which only they may confer on nearby units.
Doctrines are activated from a pool of Activation Dice. Activation Dice come from Leaders. Typically, each Leader will generate one die. (Some mighty commanders might generate two dice, or second-rate Leaders in poorly trained armies might generate none.) A player receives their full pool of dice at the start of their turn. Any left over dice from the previous turn are discarded.
Once per Phase, a Leader may attempt to activate a Doctrine for any single unit within 12” and under him in the Chain of Command. This may be any doctrine intrinsic to the force, any Doctrine specific to the targeted Unit, or an Doctrine the Leader himself is eligible to confer on it.
Doctrines will indicate in which Phase or Phases they may be Activated. Usually, they may be Activated at any time, in reaction to events. If both players wish to activate an ability at the same time, the player whose turn it is activates their Doctrine first.
The activating player then chooses how many Activation Dice he wishes to roll to Activate the Doctrine. Each Doctrine has a target number (typically 3+), depending on how mighty or complex it is. If any Activation Die equals or exceeds the target number, the Doctrine is Activated. Otherwise it fails to activate.
If he succeeds, the Doctrine is activated. If he fails, the Doctrine is not activated. No other Leader may attempt to activate the same Doctrine on the same unit that Phase.
6. Vehicles
Vehicle Characteristics
 |
| A Panzer IV |
The Front Armor and Side Armor characteristics describe a vehicle's armor . The Front Armor rating describes the main glacis plate and the front of the turret. The Other Armor rating describes the armor of the rest of the vehicle. (OtherArmor includes the rear, the top, and the undercarriage, too.) Most vehicles, of course, will have a much higher Front Armor than Side Armor. Collectively, we will refer to them as Vehicle Armor.
Typical Vehicle Armor ratings are as follows:
- VA 4 or less: The vehicle is soft-skinned, offering only incidental protection against small arms. Even weapons with no Anti-Tank rating can harm them.
- VA 5 is the minimum rating a vehicle facing needs to be considered armored, rendering it immune to small-arms fire with no Anti-Tank rating.
- VA 6 or more: Any serious armored fighting vehicle will have a rating of 6. Each additional point of rating provides the vehicle with greater resilience against ever higher Anti-Tank characteristics.
- Vehicles may be Open-Topped, making them more vulnerable to ranged attacks (particularly in Firefights) and assault. Open-Topped Vehicles are easier to-Wound.
- Most Vehicles will be Closed-Topped, with armored tops and hatches. By default, we will assume that our Closed-Topped vehicles are rather like those of World War Two, and have limited fields of vision.
- If the crew has the hatches open, maybe with the commander standing in the open cupola, we will describe the tank as Unbuttoned. An Unbuttoned tank counts as Open-Topped.
- When the crew are inside and have all the hatches closed and locked, with the vision blocks down, we will describe the tank as Buttoned. A Buttoned tank is less vulnerable to incoming fire, but suffers a penalty to-Hit.
Some of our tanks are more advanced, having internal air supplies, high-tech sensors, or advanced, fireproof canopies. We will describe such vehicles as Sealed. Sealed Vehicles are always Buttoned but they do not suffer the usual penalties to-Hit. They are also less vulnerable to certain weapons, such as flame-throwers.
Vehicles are by default Mobile and Active. Damage and battlefield hazards may put a Vehicle into one of several states:
- Immobilized: The Vehicle is stuck on terrain, has thrown a tread, or suffered some other mishap. It can no longer move or rotate on its axis for the remainder of the game.
- Stunned: The Vehicle has suffered some misfortune that has incapacitated the crew temporarily. Perhaps they are rattled by a glancing hit, must make some repair, or reorganize after one of them has become a casualty. If the Vehicle is a robot of some kind, maybe it has suffered a temporary failure. A Stunned Vehicle can do nothing for one turn.
- Destroyed: The Vehicle is wrecked. Leave the model in place (maybe with suitable smoke), but it cannot do anything else for the game and is considered a casualty.
In Shooting and Firefight
Vehicles fire their weapons just like infantry, with following changes:
- A Buttoned Vehicle (that is not also sealed) suffers a -1 Penalty to hit.
- When they have moved in the previous Movement phase, they fire at their full Rate of Fire but suffer a -1 to-Hit.
- Certain Vehicles, depending on design, may only be able to fire a limited number of weapons each phase, or only be able to fire certain weapons when in a certain state. For example, perhaps the Vehicle has only one crewman to fire both a machine-gun and a main gun, so the controlling player must choose which one to use. Or perhaps the Vehicle mounts a machine-gun on the cupola ring which can only be fired if the vehicle is Unbuttoned.
 |
| Boom! |
A Vehicle may not charge into contact. Nevertheless, a Vehicle has a limited chance to squash an infantry model attacking it:
- For each infantry model within 2" of the Vehicle, the Vehicle's player rolls a die. On a 5 or less, they are unharmed. On a 6, the Vehicle grinds over them them, and they suffer a Massive 2, AP 1, Offensive 2 Hit.
To -hit and Wound Against Vehicles
Shooting and Firefight
Roll to-Hit a vehicle as if it were an infantry figure, but with the following changes:
 |
| Burn! |
- A Vehicle may never Cower.
- A Vehicle must be 50% obscured or in area terrain to claim Concealment.
- In Shooting resolve the hit against the relevant Vehicle Armor facing (Front or Other). Direct-fire hits from the front quarter use the Front Armor. All other Hits use the Other Armor rating.
- In Firefight resolve the hit against the Vehicle's Other Armor.
- Each point of Vehicle Armor on the facing increases the to-Wound roll by 1. Each point of Anti-Tank on the weapon negates one point of Vehicle Armor rating.
- Buttoned Vehicles (including Sealed Vehicles) are immune to the double-six rule. If their Vehicle Armor rating brings the to-Wound number to 7+ or above, they cannot be wounded at all by that weapon.
- Open-Topped Vehicles (including all Unbuttoned Vehicles) can be wounded by double-sixes. If their Vehicle Armor rating brings the to-Wound number to 7+ or above, then reroll every six. A second six results in a Wound.
- If the roll exactly equals the score needed to-Wound (or is double-six) the vehicle is potentially Stunned.
- If the roll exceeds the score needed to-Wound, then the Vehicle is potentially Destroyed.
- Vehicles are big. By default, all Vehicles are Awkward 2, which reduces their Cover Save by 2.
- A typical Vehicle has a 5+ base Cover Save in Shooting.
- A typical Vehicle has NO base Cover Save in Firefight.
- A Vehicle must be 50% obscured by Hard Cover in order to gain a bonus from it.
- A Vehicle 25% obscured by Hard Cover may claim a Soft Cover bonus instead.
- A Vehicle must be 50% obscured or in area terrain to gain a bonus from Soft Cover.
Vehicles do not like Melee, when they can be swarmed by enemy infantry carrying bombs, guns, or even just gun butts. Melee follows the usual ruleswith the following exceptions:
The following rules apply to-Hit Vehicles in Melee:
- Any enemy infantry model in base contact with a Vehicle or within 2" automatically hit a Vehicle (including a Sealed Vehicle) with their full Rate of Attacks. (Usually, this is only 1 for bombs or grenades.)
- Attacking Models must roll to-Wound Buttoned Vehicles (including all Sealed Vehicles). Resolve the to-Hit against the Vehicles Side Armor.
- Each point of Vehicle Armor on the facing increases the to-Wound roll by 1. Each point of Anti-Tank on the weapon negates one point of Vehicle Armor rating.
- All Vehicles in Melee can be wounded by double-sixes. If their Vehicle Armor rating brings the to-Wound number to 7+ or above, then reroll every six. A second six results in a Wound.
- If the roll exactly equals the score needed to-Wound (or is double-six) the vehicle is potentially Destroyed.
- The weapon must be a Melee weapon to attack -- no shooting guns in Melee.
- Open-topped Vehicles (including Unbuttoned Vehicles), Immobilized Vehicles and Stunned Vehicles are automatically destroyed in Melee.
- Vehicles do not normally receive a Cover Save in Melee (although special vehicles may for some reason receive them -- for example, if they have a force field.)
- Vehicles must are always considered to have lost Melee and must attempt to Break Away.
7. Terrain
Area Terrain
Area Terrain is terrain with a designated boundary. Usually, it is on a base, and any models on that base is considered to be in the terrain and subject to its effects. Sometimes (as with a forest made of individual trees or a ruining set of walls) players will need to agree on where the boundary lies before the game begins.
All models within area terrain are subject to the same effects (usually providing concealment and or cover). Line of sight may be traced freely into and out of area terrain, regardless of incidental features that may be modeled to represent the terrain. Indeed, as with a typical forest base, objects representing the terrain, such as trees, may be shuffled around the base or even removed entirely to make room for models.
Line of Sight may not normally be traced through area terrain. (You might want to make exceptions for particularly low-lying terrain, such as bushes.
Linear Terrain
Linear Terrain is terrain that provides directional Concealment and/or Cover. Usually, it covers things like low walls or hedges. However, it only provides these benefits from a direction passing over the line of the terrain. Line of sight and fire from behind the line is unaffected.
Ruins
Ruins are a sub-type of Area Terrain. They usually consists of a base of rubble and some sticking-up walls. Sometimes, they have multiple stories (usually open in the back to allow you to set models on them. Ruins need some special rules:
- Models may trace line of sight through any part of a wall with windows or significant gaps in it. We may assume the models move around to find the windows or knock firing holes.
- Models may move through any part of a wall with windows or significant gaps in it. This is true even if the windows don't seem big enough to fit a model. We will assume the models can knock holes, climb, or blast a way through.
- Truly solid walls with no openings do not confer line of sight, or permit movement. It's either one or the other.
- If the ruins have multiple floors, we will assume they can climb up and down freely and don't need to find stairs or elevators specially to move. Movement up and down a floor is (by default) 3", even if the floors are a bit farther apart than that.
- Ruins are very difficult (4+) terrain for vehicles moving within the terrain.
- You cannot trace line of sight through Ruins, across the base.
Rivers
Now that I have terrain on the brain, I've been thinking a bit about river rules.
- Rivers are Area Terrain, but they do not block line of sight for models behind it.
- Rivers are either Shallow or Deep. Shallow Rivers are difficult terrain. Deep Rivers are very difficult terrain. If the River has fords or crossings, then those parts of the river are one step less difficult -- not difficult for Shallow Rivers and difficult for Deep Rivers.
- Models that are partially or completely in the river gain an Tall 2 Characteristic. Tall 2 reduces the model's Cover Save by 2. If they are already Tall, this does not stack -- take the higher value. Most Vehicles are already at least Tall 2.
(c) 2012 Thomas B. de Mayo (12/11/12)
This web site is completely unofficial and in no way endorsed by Battlefront Miniatures.
This web site is completely unofficial and in no way endorsed by Games Workshop Limited.
Adeptus Astartes, Battlefleet Gothic, Black Flame, Black Library, the Black Library logo, BL Publishing, Blood Angels, Bloodquest, Blood Bowl, the Blood Bowl logo, The Blood Bowl Spike Device, Cadian, Catachan, the Chaos device, Cityfight, the Chaos logo, Citadel, Citadel Device, City of the Damned, Codex, Daemonhunters, Dark Angels, Dark Eldar, Dark Future, the Double-Headed/Imperial Eagle device, 'Eavy Metal, Eldar, Eldar symbol devices, Epic, Eye of Terror, Fanatic, the Fanatic logo, the Fanatic II logo, Fire Warrior, Forge World, Games Workshop, Games Workshop logo, Genestealer, Golden Demon, Gorkamorka, Great Unclean One, the Hammer of Sigmar logo, Horned Rat logo, Inferno, Inquisitor, the Inquisitor logo, the Inquisitor device, Inquisitor:Conspiracies, Keeper of Secrets, Khemri, Khorne, Kroot, Lord of Change, Marauder, Mordheim, the Mordheim logo, Necromunda, Necromunda stencil logo, Necromunda Plate logo, Necron, Nurgle, Ork, Ork skull devices, Sisters of Battle, Skaven, the Skaven symbol devices, Slaanesh, Space Hulk, Space Marine, Space Marine chapters, Space Marine chapter logos, Talisman, Tau, the Tau caste designations, Tomb Kings, Trio of Warriors, Twin Tailed Comet Logo, Tyranid, Tyrannid, Tzeentch, Ultramarines, Warhammer, Warhammer Historical, Warhammer Online, Warhammer 40k Device, Warhammer World logo, Warmaster, White Dwarf, the White Dwarf logo, and all associated marks, names, races, race insignia, characters, vehicles, locations, units, illustrations and images from the Blood Bowl game, the Warhammer world, the Talisaman world, and the Warhammer 40,000 universe are either ®, TM and/or © Copyright Games Workshop Ltd 2000-2012, variably registered in the UK and other countries around the world. Used without permission. No challenge to their status intended. All Rights Reserved to their respective owners.
No comments :
Post a Comment