


A Leadership test is (simply) a roll against the Leadership score, expressed between 2+ and 6+. If the roll is equal to or higher than the target, the Leadership test is passed. Otherwise, it fails.
When testing against a unit, always roll against the highest Leadership in a unit.
When testing against a force's Leadership, use the Leadership score of the highest ranking (surviving) figure. If there are several equally-ranked figures, the rolling player may choose any one of them.
Make any needed Break tests from the lowest point(s) in the chain of command and work your way up.
Break Tests
The most common form of Leadership test is the Break Test.
A unit must make a Break Test under the following circumstances:
1) If the unit falls below 50% of its starting strength in any phase.
2) If already below 50% of its starting strength, the unit takes a further casualty in any phase.
The unit must make a Break Test at the end of the phase. Sometimes, it the Unit may use a Doctrine to re-roll or ignore the result,. If it fails the roll, and/or any re-rolls to which it is entitled, and cannot otherwise ignore the result, it is removed from play.
Command Break Tests
If a command of several units takes enough casualties, then its whole structure may unravel. We will define a command as any units under a single leader at the start of the game. These will usually be Platoons and Companies, or their equivalent.
A command must take a Break Test under the following circumstances:
1) If his command falls below 50% of its starting units (not including Independant single-model Leaders) in any phase.
2) If already below 50% of its starting strength, it loses another unit in any phase.
The command must make a Break Test at the end of the phase.
When testing against a command's Leadership, use the Leadership score of
the highest ranking (surviving) figure. If there are several
equally-ranked figures, the rolling player may choose. Sometimes, the command may use a Doctrine to re-roll or ignore the result. If it
fails the roll, and/or any re-rolls to which it is entitled, and cannot
otherwise ignore the result, the entire force decides it can no longer
continue to fight. Remove the entire command from the board.
Force Break Tests
Your force as a whole may need to take a Break Test, too.
A force a unit must make a Break Test under the following circumstances:
1) If the force falls below 50% of its starting units (not including Independant single-model Leaders) in any phase.
2) If already below 50% of its starting strength, it loses another unit in any phase.
The force must make a Break Test at the end of the phase. When testing against a force's Leadership, use the Leadership score of
the highest ranking (surviving) figure. If there are several
equally-ranked figures, the rolling player may choose. Sometimes, the Force may use a Doctrine to re-roll or ignore the result. If it
fails the roll, and/or any re-rolls to which it is entitled, and cannot
otherwise ignore the result, the entire force decides it can no longer continue to fight. Remove the entire force from the board. You lose.
Geek Notes:
A failed Break Test does not necessarily mean that your soldiers throw down their rifles and desert. (Although it can mean that.) Instead, it means that your unit no longer has the leadership or coherency to act effectively, and either retreats or goes to ground, and plays no further role in the battle.
You will probably notice the strong similarity between this system and Flames of War. I find FoW's approach sensible. It is much easier to break a unit or an army in Flames of War than in Warhammer 40k -- this is as it should be. Units in 40k linger an awfully long time with only one or two soldiers left. If, however, we assume that a unit's effectiveness relies on its teamwork and morale, then it should be rare for a unit to fight to the last man. Casualties will remove it as an effective battlefield agent before everyone dies.
Likewise, your force as a whole may lose leadership and cohesion through battlefield attrition, and after a certain point, will no longer be able to act effectively. Thus, it is possible (even likely) to force an army to withdraw without totally destroying it.
As another note, many games in the Warhammerfamily use 2D6 for leadership -- a larger roll gives a greater spread of result. It also produces a bell curve, making central results more likely than extreme ones. All these are good things, but they don't seem useful enough to justify introducing a completely different dice mechanic.
Wednesday, October 31, 2012
Monday, October 29, 2012
Mars: The Colonial Infantry Overview
An Overview of the Colonial Infantry
 It's time to continue with my sample setting, this time taking my general notes and creating the framework of a real army list. I think the Colonial forces will be the most illustrative army with which to start, since they are composed of normal humans and follow a (quasi) historical military organization.
First, let us consider how our game play will affect what sorts of military organizations we can represent. Our game is going to be mostly an infantry game: at 28mm, the models are simply too damned big to support a good tank game. We might eventually be able to squeeze in a mechanized or cavalry force for variety, but for now let's stick with mostly foot-slogging infantry.
My list will follow the organization of a typical European Infantry battalion/company/platoon from the interwar period or early part of WWII.
I want it to be able to represent anything from a platoon to a battalion. Given the size of a typical gaming board (usually 4'x6'), a company is about right for most games. If we can get a hold of a really big table, we might be able to field a battalion. Sometimes people like to play small games, so a platoon-level game should be an option too.
I also want my force to be heavily supported. Many of our favorite toys (like tanks) aren't integral parts of most infantry companies or battalions, but we want to play with them anyway. So lots of support - perhaps even ludicrous levels of support.
Squad, Platoon, Company and Battalion
Squads
Let's turn to the actual historical organization of infantry forces in WWII, starting with the squad and working our way up. (If you're interested, Osprey's Infantry Tactics of the Second World War on my lap as I write.)
Most armies in WWI fielded squads ("sections" in British parlance) of eight to twelve men. Several of the men (usually two) would carry and field a light machine-gun. The squad leader, typically some variety of Sergeant, might carry a pistol, carbine or sub-machine-gun. Everyone else had a rifle. The LMG provided most of the squad's firepower, not the rifles.
There were variations, of course. Fortunately well-armed German squads might have more than one LMG, while US forces often lacked the LMG altogether.
But this will be good for going on with. Squads will be our basic unit, with 1 leader, 5-9 riflemen, and 2 machine-gunners mounted together on a base.
Platoons
A Platoon typically consisted of three squads, a command squad, and a small number of support weapons. The command squad usually had a leader (typically a Lieutenant or a higher variety of Sergeant) and a few other men. In the early war, the support elements would often include a 2-inch (or 51mm or 60mm) light mortar team of three men, and sometimes an anti-tank rifle of two. Some armies might have an extra LMG or pair of LMGs.
For our purposes, we will give every Platoon a unit consisting of a Lieutenant and four riflemen. It must then take at least two and up to three squads.
Support weapons will be optional, with each team mounted together on a base. They may form units of their own, or they may be attached to one of the squads in the platoon.
Companies
A Company typically consisted of three platoons, a command squad, and possibly a forth weapons platoon or squad consisting of bigger, meaner support weapons, typically machine-guns.
As with out Platoon, we will give the company a two command squads consisting of a Leader and five men. One such command squad will be the Captain, the second a Lieutenant. It must then take at least two, and up to three platoons.
Support weapons will be optional, with each team mounted together on a base. They may form units of their own, or they may be attached to one of the squads in the company.
Battalions
A Battalion in turn consisted a command squad, three companies of riflemen, and even more support weapons. Often these weapons were grouped into their own weapon's company.
We will give the Battalion two command squads consisting of a Leader and five men. One such command squad will be the Lieutenant Colonel, the second a Major. It must then take at least two, and up to three Companies.
Support weapons will be optional, with each team mounted together on a base. They may form units of their own, or they may be attached to one of the squads in the battalion
Attachments and Assignments
With many weapons, the player has a choice whether to deploy them as separate units, or to attach them to other squads in the chain of command. (At the start of the game.) We will use the term attach to mean that the weapons leave their original unit and become a part of their new unit for all purposes for the rest of the game.
We will use the term assign to indicate that these units are temporarily a part of a Leader's chain of command. Usually they will fall directly under the force's leader, but a Lieutenant-Colonel, a Captain or a Lieutenant may have the opportunity to further assign an asset farther down the chain of command.
Assigned assets may also sometimes be attached to a unit. For example, a Captain may attach some HMGs to a particular squad.
Core and Support
We will divide our units into two types. Those that are a normal part of the formation will be called Core. Those that come from elsewhere we will call Support.
 Each level of force (Platoon, Company and Battalion) will
automatically include any integral assets for that level as part of its Core. It will also have a list of external Support choices
that it can take. This list will always include choices from
immediately above it in the chain of command, as well as other choices
from father away. The number of choices and the variety of equipment
will increase at each level.
Each level of force (Platoon, Company and Battalion) will
automatically include any integral assets for that level as part of its Core. It will also have a list of external Support choices
that it can take. This list will always include choices from
immediately above it in the chain of command, as well as other choices
from father away. The number of choices and the variety of equipment
will increase at each level.
When building a force, you may only choose Support Choices from the highest level of your command. For example, a Battalion level force chooses from the Battalion Support Choices. It may NOT also make selections from the list of Company Support Choices or Platoon Support Choices for each of its Companies and Platoons. The Battalion Support Choices include all total available Support for the force. If the Battalion leader wants one of his Companies to have some support, he will have to assign it downward to his subordinates.
How Much Support?
There's a limit to the number of goodies any force should have, in particular the number of vehicles. After playing FoW for many years, I can attest that tanks are the most important form of support for an infantry company. Since most infantry are nearly helpless against the metal beasts, even a few armored cars can bring an infantry advance to a halt. Often FoW games turn into a vehicular duel, with the winner is then free to mop up enemy infantry at his leisure.
So how much stuff is too much?
At the Company level, I envision the following limits to Support:
0-1 Howitzer Batteries
0-2 Anti-Infantry Weapons (Mortars or HMGS)
0-2 Anti-tank Gun Batteries
0-1 Light Vehicle squads (such as armored cars)
0-1 Tank squads
By limiting tanks to one unit, we prevent a strong attack or defense on two flanks simultaneously. Our battlefield will thus be inherently asymmetrical.
At the Platoon level, things should be even more limited. After all, the point is to keep the game small.
0-1 Anti-Infantry Weapons (Mortars or HMGS)
0-1 Anti-Tank Gun Batteries
0-1 Light Vehicle squads OR 1 Tank
At a Battalion level, I'm inclined to take the lid off. aAfter all, the point of a Battalion level battle is to field lots of toys.
0-2 Howitzer Batteries
0-3 Squads of Tanks
0-1 Company of Vehicles
First, let us consider how our game play will affect what sorts of military organizations we can represent. Our game is going to be mostly an infantry game: at 28mm, the models are simply too damned big to support a good tank game. We might eventually be able to squeeze in a mechanized or cavalry force for variety, but for now let's stick with mostly foot-slogging infantry.
My list will follow the organization of a typical European Infantry battalion/company/platoon from the interwar period or early part of WWII.
I want it to be able to represent anything from a platoon to a battalion. Given the size of a typical gaming board (usually 4'x6'), a company is about right for most games. If we can get a hold of a really big table, we might be able to field a battalion. Sometimes people like to play small games, so a platoon-level game should be an option too.
I also want my force to be heavily supported. Many of our favorite toys (like tanks) aren't integral parts of most infantry companies or battalions, but we want to play with them anyway. So lots of support - perhaps even ludicrous levels of support.
Squad, Platoon, Company and Battalion
Squads
Let's turn to the actual historical organization of infantry forces in WWII, starting with the squad and working our way up. (If you're interested, Osprey's Infantry Tactics of the Second World War on my lap as I write.)
Most armies in WWI fielded squads ("sections" in British parlance) of eight to twelve men. Several of the men (usually two) would carry and field a light machine-gun. The squad leader, typically some variety of Sergeant, might carry a pistol, carbine or sub-machine-gun. Everyone else had a rifle. The LMG provided most of the squad's firepower, not the rifles.
There were variations, of course. Fortunately well-armed German squads might have more than one LMG, while US forces often lacked the LMG altogether.
But this will be good for going on with. Squads will be our basic unit, with 1 leader, 5-9 riflemen, and 2 machine-gunners mounted together on a base.
Platoons
A Platoon typically consisted of three squads, a command squad, and a small number of support weapons. The command squad usually had a leader (typically a Lieutenant or a higher variety of Sergeant) and a few other men. In the early war, the support elements would often include a 2-inch (or 51mm or 60mm) light mortar team of three men, and sometimes an anti-tank rifle of two. Some armies might have an extra LMG or pair of LMGs.
For our purposes, we will give every Platoon a unit consisting of a Lieutenant and four riflemen. It must then take at least two and up to three squads.
Support weapons will be optional, with each team mounted together on a base. They may form units of their own, or they may be attached to one of the squads in the platoon.
Companies
A Company typically consisted of three platoons, a command squad, and possibly a forth weapons platoon or squad consisting of bigger, meaner support weapons, typically machine-guns.
As with out Platoon, we will give the company a two command squads consisting of a Leader and five men. One such command squad will be the Captain, the second a Lieutenant. It must then take at least two, and up to three platoons.
Support weapons will be optional, with each team mounted together on a base. They may form units of their own, or they may be attached to one of the squads in the company.
Battalions
A Battalion in turn consisted a command squad, three companies of riflemen, and even more support weapons. Often these weapons were grouped into their own weapon's company.
We will give the Battalion two command squads consisting of a Leader and five men. One such command squad will be the Lieutenant Colonel, the second a Major. It must then take at least two, and up to three Companies.
Support weapons will be optional, with each team mounted together on a base. They may form units of their own, or they may be attached to one of the squads in the battalion
Attachments and Assignments
With many weapons, the player has a choice whether to deploy them as separate units, or to attach them to other squads in the chain of command. (At the start of the game.) We will use the term attach to mean that the weapons leave their original unit and become a part of their new unit for all purposes for the rest of the game.
We will use the term assign to indicate that these units are temporarily a part of a Leader's chain of command. Usually they will fall directly under the force's leader, but a Lieutenant-Colonel, a Captain or a Lieutenant may have the opportunity to further assign an asset farther down the chain of command.
Assigned assets may also sometimes be attached to a unit. For example, a Captain may attach some HMGs to a particular squad.
Core and Support
We will divide our units into two types. Those that are a normal part of the formation will be called Core. Those that come from elsewhere we will call Support.
Each level of force (Platoon, Company and Battalion) will
automatically include any integral assets for that level as part of its Core. It will also have a list of external Support choices
that it can take. This list will always include choices from
immediately above it in the chain of command, as well as other choices
from father away. The number of choices and the variety of equipment
will increase at each level. When building a force, you may only choose Support Choices from the highest level of your command. For example, a Battalion level force chooses from the Battalion Support Choices. It may NOT also make selections from the list of Company Support Choices or Platoon Support Choices for each of its Companies and Platoons. The Battalion Support Choices include all total available Support for the force. If the Battalion leader wants one of his Companies to have some support, he will have to assign it downward to his subordinates.
How Much Support?
There's a limit to the number of goodies any force should have, in particular the number of vehicles. After playing FoW for many years, I can attest that tanks are the most important form of support for an infantry company. Since most infantry are nearly helpless against the metal beasts, even a few armored cars can bring an infantry advance to a halt. Often FoW games turn into a vehicular duel, with the winner is then free to mop up enemy infantry at his leisure.
So how much stuff is too much?
At the Company level, I envision the following limits to Support:
0-1 Howitzer Batteries
0-2 Anti-Infantry Weapons (Mortars or HMGS)
0-2 Anti-tank Gun Batteries
0-1 Light Vehicle squads (such as armored cars)
0-1 Tank squads
By limiting tanks to one unit, we prevent a strong attack or defense on two flanks simultaneously. Our battlefield will thus be inherently asymmetrical.
At the Platoon level, things should be even more limited. After all, the point is to keep the game small.
0-1 Anti-Infantry Weapons (Mortars or HMGS)
0-1 Anti-Tank Gun Batteries
0-1 Light Vehicle squads OR 1 Tank
At a Battalion level, I'm inclined to take the lid off. aAfter all, the point of a Battalion level battle is to field lots of toys.
0-2 Howitzer Batteries
0-3 Squads of Tanks
0-1 Company of Vehicles
Sunday, October 28, 2012
Martian Weapons
So, to continue with my example setting planning, let's look at some Martian weapons. (Again, this may not become a full setting, but it helps me thing about and explain issues of list design and balance.)
The Death Ray
Like most Martian technology, the Death Ray was originally an Ancient Device, but is now known among all Martian civilizations.
The Death Ray is a directed energy weapon which targets a living being's nervous system and internal organs, bypassing skin, muscle, and bone. When fired, the barrel discharges a flash of light and a crackle of electricity. A similar, larger, nimbus often manifests at the point of impact, haloing the target creature. Because it does not deliver a projectile or kinetic energy, the Death Ray often leaves no entry or exit wound. However, the transfer of energy to internal tissue sometimes results in thermal overflow. A creature hit by a Death Ray may thus appear cooked, steamed or split from within, particularly if struck by one of the larger versions of the weapon.
The Heat Beam
The Heat Beam is the signature Ancients' weapon, typically mounted on their vehicles. A directed energy weapon, the Beam produces either a wide area effect "arc" or a tightly concentrated "lance." The area setting rapidly increases the temperature of any target in the zone. The first sign of its effect is a shimmer int eh ear, followed by flash ignition of cloth, hair, and vegetation. After several seconds, flesh wood and plastic will burn or melt. Particularly intense sweeps may result in firestorms or concussive effects as the air heats too rapidly The "lance" setting burns through armor. The power requirements of the Heat Beam largely confine its use to Ancient vehicles, but in some cases a light Heat Beam may be mounted on a carriage for use by infantry.
Magneto-javelins
Employed primarily by the Free Humans, this weapon uses magnetic rails or rings to fire a elongated metal bolt. It offers clear advantages over chemical firearms, in terms of penetrating power, velocity and payload. The elongated cylindrical or ovoid shape of the projectile appears necessary to properly interface with weapon's firing field -- in some cases, the rear of the projectile is discarded after launch. Largely a specialty weapon, it excels at delivering kinetic kills to large creatures, or shaped charges to vehicular targets. The Free Humans clearly regard it as inferior to energy weapons, and only use it when necessary to actual projectiles against reinforced targets.
Conventional Guns
Firearms using chemical propellants remain the mainstay of Colonial technology. Small arms remain largely bolt-action pieces, with clips of varying sizes. A few automatic prototypes have been produced, as well as a larger number of sub-machine-guns firing pistol ammunition. Colonial troops regularly employ machine-guns of varying calibers and portability, and rapid firing artillery and howitzers. Mortars remain a new addition to their arsenal, as do lighter, man or vehicle portable anti-tank guns. The Colonials mount increasingly larger guns on their vehicles, as they search for some counter to the Ancients' powerful walkers.
The Brutes also make use of conventional firearms. Such pieces are almost always custom-built or built in small batches for each tribe, and rarely with a standardization of parts or ammunition. Some are equal to Colonial technology -- others are more primitive smooth-bore or rifled musket-loading weapons. The Brutes only occasionally manufacture larger canon or machine-guns, and then only at the specialized forges maintained by the largest tribes. Brute weapons often have a larger calibre than Colonial ones, if only because Brutes are bigger and can hold a more massive weapon.
Colonial Firearms
The three gun entries (Light, Medium and Heavy) represent different carriage or turret-mounted guns. Light covers things such as early WWII 37mm or short 75mm guns, Medium guns represents later 75mms such as those on the Sherman or Panzer III, Heavy Guns represent advanced tank hunting pieces such as the 17pdr or the German 88mm.
Brute Firearms
Geek Notes
You may notice that some of my conceptions have changed slightly since my initial Martian post. I think the balance of weapon types and availability is quite important in defining the setting and in balancing play. I don't want any one faction to overwhelmingly dominate another, or for one race's strength to be totally negated by an overabundance of countering weaponry.
The Death Ray in particular gave me problems. As the staple weapon of the Free Humans and human servants of the Ancients, it will be represented in multiple factions. At first I was going to make it Massive, but this seemed a bit unfair to the Brutes. The Brute's guns really ought to be Massive, and so should a lot of colonial pieces. That would give just about everybody Toughness-negating weaponry! What's a Brute to do? So then I thought about giving Death Rays AP, but that didn't seem to fit thematically. Eventually, I settled on just making them normal weapons, but giving the larger versions AP and Massive qualities. That puts the "basic" back into basic guns -- which are, after all, assumed to be man-lethal.
I have also endeavored to facilitate distinctive modeling of each gun type. Modelers can make a Death Ray by adding a bead or crystal to the stock of any existing gun. Magneto-javelins can be modeled with crossbow bits, maybe with some rings added, if the modeler is feeling creative. And there should be no lack of parts for Colonial and Brute weaponry.
The Death Ray
Like most Martian technology, the Death Ray was originally an Ancient Device, but is now known among all Martian civilizations.
The Death Ray is a directed energy weapon which targets a living being's nervous system and internal organs, bypassing skin, muscle, and bone. When fired, the barrel discharges a flash of light and a crackle of electricity. A similar, larger, nimbus often manifests at the point of impact, haloing the target creature. Because it does not deliver a projectile or kinetic energy, the Death Ray often leaves no entry or exit wound. However, the transfer of energy to internal tissue sometimes results in thermal overflow. A creature hit by a Death Ray may thus appear cooked, steamed or split from within, particularly if struck by one of the larger versions of the weapon.
Name
|
Range
|
RoF
|
Type
|
Mas
|
AP
|
HE
|
AT
|
Death Ray Carbine
|
24”
|
2
|
Man
|
0
|
0
|
0
|
0
|
Death Projector
|
24”
|
10
|
Light
|
01
|
1
|
0
|
0
|
Death Ray Cannon
|
36”
|
2
|
Heavy
|
2
|
2
|
0
|
0
|
The Heat Beam
 |
| Burrrrrn! |
Name
|
Range
|
RoF
|
Type
|
Mas
|
AP
|
HE
|
AT
|
Heat
Beam Projector (Arc)
|
24”
|
10
|
Light
|
0
|
0
|
1
|
0
|
Light
Heat Beam (Arc/Lance)
|
36”
|
10/2
|
Light
|
0
|
0
|
2/1
|
0/4
|
Medium
Heat Beam (Arc/Lance)
|
48”
|
10/2
|
Heavy (Vehicle Only)
|
0
|
0
|
3/1
|
0/5
|
Heavy
Heat Beam (Arc/Lance)
|
60”
|
10/2 |
Heavy (Vehicle Only)
|
0
|
0
|
4/1
|
0/6
|
Magneto-javelins
Employed primarily by the Free Humans, this weapon uses magnetic rails or rings to fire a elongated metal bolt. It offers clear advantages over chemical firearms, in terms of penetrating power, velocity and payload. The elongated cylindrical or ovoid shape of the projectile appears necessary to properly interface with weapon's firing field -- in some cases, the rear of the projectile is discarded after launch. Largely a specialty weapon, it excels at delivering kinetic kills to large creatures, or shaped charges to vehicular targets. The Free Humans clearly regard it as inferior to energy weapons, and only use it when necessary to actual projectiles against reinforced targets.
Name
|
Range
|
RoF
|
Type
|
Mas
|
HE
|
AT
|
|
Javelin Projector
|
24”
|
2
|
Man
|
1
|
1
|
0
|
0
|
Rapid Javelin Projector
|
24”
|
10
|
Light
|
2
|
2
|
0
|
0
|
Javelin Cannon
|
36”
|
2
|
Heavy
|
3
|
3
|
0
|
0
|
| Javelin Tank Hunter | 24" | 2 | Man | 1 | 1 | 1 | 3 |
Conventional Guns
Firearms using chemical propellants remain the mainstay of Colonial technology. Small arms remain largely bolt-action pieces, with clips of varying sizes. A few automatic prototypes have been produced, as well as a larger number of sub-machine-guns firing pistol ammunition. Colonial troops regularly employ machine-guns of varying calibers and portability, and rapid firing artillery and howitzers. Mortars remain a new addition to their arsenal, as do lighter, man or vehicle portable anti-tank guns. The Colonials mount increasingly larger guns on their vehicles, as they search for some counter to the Ancients' powerful walkers.
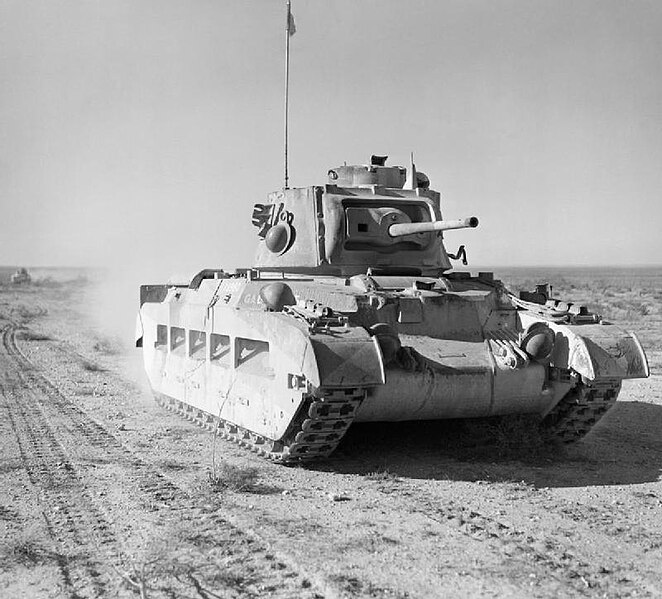 |
| The Matilda II. (Wikipedia.) |
Colonial Firearms
Name
|
Range
|
RoF
|
Type
|
Mas
|
AP
|
HE
|
AT
|
Rifle
|
24”
|
2
|
Man
|
0
|
0
|
0
|
0
|
SMG
|
12”
|
6
|
Man
|
0
|
0
|
0
|
0
|
LMG
|
24”
|
10
|
Light
|
1
|
0
|
0
|
0
|
HMG
|
36"
|
10
|
Heavy
|
2
|
1
|
0
|
1
|
Mortar
|
48”
|
10
|
Heavy
|
0
|
0
|
1
|
0
|
Light Artillery (HE/AT)
|
72”
/36”
|
15/2
|
Heavy
|
1/3
|
0/1
|
2/0
|
0/3
|
Light Gun
(HE/AT)
|
36”
|
10/2
|
Heavy
|
0/3
|
0/1
|
2/0
|
0/3
|
Medium Gun
(HE/AT)
|
48”
|
10/2
|
Heavy
|
0/4
|
0/2
|
2/0
|
0/4
|
Heavy Gun
|
60”
|
10/2
|
Heavy
|
0/5
|
0/3
|
3/0
|
1/5
|
The three gun entries (Light, Medium and Heavy) represent different carriage or turret-mounted guns. Light covers things such as early WWII 37mm or short 75mm guns, Medium guns represents later 75mms such as those on the Sherman or Panzer III, Heavy Guns represent advanced tank hunting pieces such as the 17pdr or the German 88mm.
Brute Firearms
Name
|
Range
|
RoF
|
Type
|
Mas
|
AP
|
HE
|
AT
|
Brute Musket
|
24”
|
1
|
Man
|
1
|
0
|
0
|
0
|
Brute Rifle
|
24”
|
2
|
Man
|
1
|
0
|
0
|
0
|
Brute LMG
|
24”
|
10
|
Light
|
2
|
0
|
0
|
0
|
Light Brute Cannon
(HE/AT)
|
36”
|
10/2
|
Heavy
|
0/4
|
0/1
|
2/0
|
0/3
|
Medium Brute Cannon
(HE/AT)
|
48”
|
10/2
|
Heavy
|
0/5
|
0/2
|
2/0
|
0/4
|
Geek Notes
You may notice that some of my conceptions have changed slightly since my initial Martian post. I think the balance of weapon types and availability is quite important in defining the setting and in balancing play. I don't want any one faction to overwhelmingly dominate another, or for one race's strength to be totally negated by an overabundance of countering weaponry.
The Death Ray in particular gave me problems. As the staple weapon of the Free Humans and human servants of the Ancients, it will be represented in multiple factions. At first I was going to make it Massive, but this seemed a bit unfair to the Brutes. The Brute's guns really ought to be Massive, and so should a lot of colonial pieces. That would give just about everybody Toughness-negating weaponry! What's a Brute to do? So then I thought about giving Death Rays AP, but that didn't seem to fit thematically. Eventually, I settled on just making them normal weapons, but giving the larger versions AP and Massive qualities. That puts the "basic" back into basic guns -- which are, after all, assumed to be man-lethal.
I have also endeavored to facilitate distinctive modeling of each gun type. Modelers can make a Death Ray by adding a bead or crystal to the stock of any existing gun. Magneto-javelins can be modeled with crossbow bits, maybe with some rings added, if the modeler is feeling creative. And there should be no lack of parts for Colonial and Brute weaponry.
 |
| Looks like Mars, don't it? (Wikipedia) |
Subscribe to:
Posts
(
Atom
)