WWPD
WWPD
WWPD
WWPD
WWPD
WWPD
WWPD
WWPD
WWPD

Sunday, July 28, 2013

Back from Historicon

Shopping.
I'm back from Historicon, where I saw lots of people from WWPD.  Hi everybody!  We said farewell to Steve, who's off to labor in the Hobbit mines of New Zealand. 

I did some shopping in the dealer's room, looking for models for Mars.  ("Mars wants your miniatures!")  I came back with some stuff that will soon grace these posts. I wanted a tank for my Martian Colonists, some more Colonial guns, and models for the Ancients' infantry.  Plus whatever else looked cool.
  
Here's what I got:


More next week.

The Ancients are Coming

Fear them!

Saturday, July 20, 2013

Playtesting the Trireme

My wife's cousin Sam visited us in Virginia for the Fourth of July.  We spent one afternoon playtesting across the surface of Mars.   I took the Martian Colonists, and Sam played the Free Martians.  We used the symmetrical scenario and the two attacking lists.

I'd just finished the trireme, so I added that to the Martian list and made up some stats on the spot.  Its armor was too tough for the Colonists to destroy it, but it's open-topped, so it could be stunned on double sixes.

Sam set up the trireme on one flank where it could escort a unit of swordsmen across the board.  He put his other forces on the other side, occupying a hill and ready to advance.  In theory, I was supposed to attack too, but I knew the trireme would kill me in the open, so I settled for hunkering down and defending.  This game would be the trireme's hour of uncontested glory.


The setup.


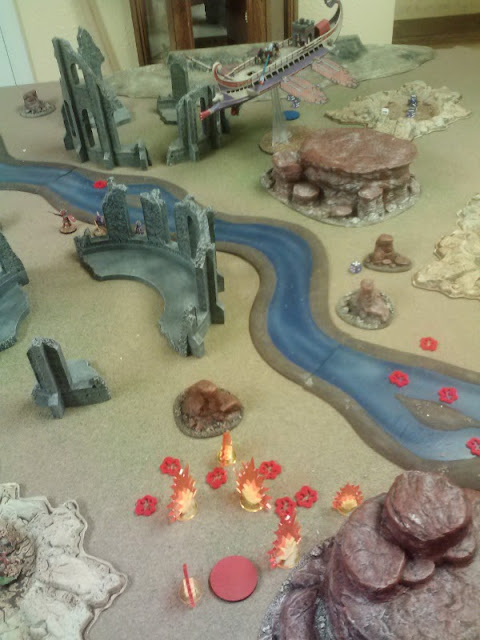
The Trireme targets some colonists.

The disposition of the colonist's flank.

The trireme opens fire.

Ka-blam!
 
While the trireme decimated one flank with its big cannon, Sam advanced his troops on the other flank.  These troops rapidly encountered the Colonial machine guns and mortars.
Forward!

The Colonists occupy the ruins, while the mortars on the hill behind open fire.

The Martians huddle in a crater.


I loom over the battlefield.

Meanwhile on the other flank, the swordsmen advance on the much-reduced colonists.
Crossing the river.
 

The foe dies.
 The Trireme is utterly devastating, and clears the colonists out of the center even faster than the swordsmen can chop them up.  In retaliation, I machinegun the swordsmen, killing them all. 


The smoking crater where my center used to be.


Using the template.
In the final stages of the game, Sam advances his forces onto a mesa, where my mortars promptly kill them all.
Climbing the mesa.


The view from the top.
 At this point, both forces have lost significant numbers of squads.  We are both close to a break test, but the Colonist army breaks first, giving the victory to Sam.
 
A late game shot, showing the carnage.
In closing thoughts, the trireme was really cool looking.  I'm glad I used template rules.  It just looks awesome to drop that pie plate over a squad.  However, I need some rules to penalize the template for moving and shooting.  Since I cannot reduce its RoF, I'll probably give the template a -1 to hit.  Or maybe a reroll of successes.  Sam suggested that the 32" range for LMGs is too long and uses up most of the board.  Maybe I will reduce it to 24", the same as rifle range.

Historicon

I'm at Historicon today, in Fredericksburg, VA.

Sunday, July 14, 2013

Roman the Skies II

I finished a vehicle for the Martian Free cities.  It's built from an Academy Roman Trireme.  (You can see the construction log here.)  I was originally going to use sails from another kit, but they were just too big.  So I used these fins, made from some plasticard.  They are actually slightly transparent. 

According to my background, the Free Cities build their vehicles from advanced synthetic materials (including energy emitters and anti-gravity strips) left over from the Ancient Civil War, but they don't understand how the technology works.  So everything is hand-assembled, using iron-age techniques. Techno-primitive.  Thus it's entirely appropriate for their flying ship to look like a ship, complete with keel, ribbing, and so forth.

The completed Trireme

Escorting some infantry.

The Martians attack a Colonial infantry platoon.

The weapon-systems: an AT gun on deck and an LMG on the undercarriage.


A rear shot.

Flying.

Beside the river.

The deck gun.  It's not Freudian. Really.
The undercarriage LMG.  It's on a magnet for swiveling.
A fin.


Translucent against the light. That and the texture gives it an iridescent look even in normal lighting.

Playest Thoughts

So here are some of my initial playtest thoughts:

  1. The games were pretty interesting, even without vehicles.  The Doctrine system works better than I had anticipated in creating choices and excitement.
  2. The game play is perhaps too much like Flames of War.  It is largely about a) whether you can Suppress your enemy and b) whether they recover from that Suppression on their following turn.  I dunno why that surprises me.  I designed it that way, after all.
  3. I may have made the defending armies a bit too small.  The Attacking forces seem to have a consistent advantage.  I may wish to add another platoon to the Colonist force, and another gun to the Free Cities, perhaps.  Finding the correct balance of forces will help me eventually point the army lists.
  4. I wonder if the LMGs should be required to retain coherency with their squad.  Just about every game, I held them back so they could fire at full RoF.  I could also reduce their range to 32", to encourage the player to advance them.
  5. The Scutatores are monsters in Melee, and pretty dang sturdy against shooting.


Sunday, July 7, 2013

A Playtest Battle Report

Here are some pictures from one of my playtests.  The Colonists are attacking in an Asymmetrical Scenario.  The Martian Free Cities are Defending.  The table is in my basement, and I commanded both sides.  (Pictures of me playing with myself in the basement!  Kinky!)

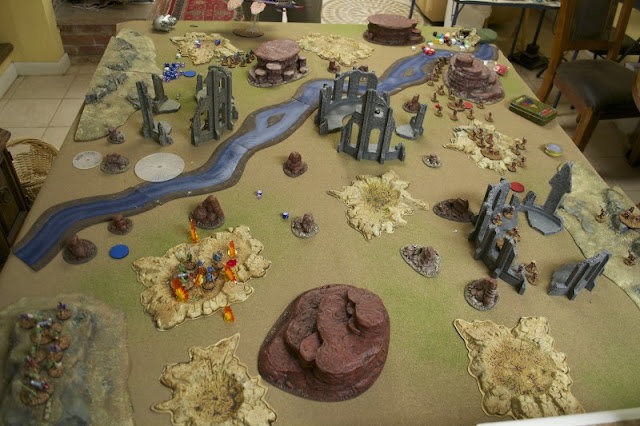
The table.


The Martians take the side of the table with a ruin and a crater.  The Colonist figures the far side is the easiest to attack, but there is no completely clear place to put it.  So it goes into a crater (soft cover).  The Martian player places the second objective in the ruins (hard cover).  The objectives are round red bases.

A view from the defender's side.

The Martian Free Cities can assign their three troop types however they like.  Martian player decides to divide his forces into three squads.  Into two squads, he places one manus of lanceatores (a blaster cannon and one lanceator) and one manus of Venatores (two venatores with carbines and a venator with an electrojavelin).  These are the his shooting troops.  The blaster cannons will provide long range fire, and the other troops will support it with shorter-range fire.

The armies deployed.


The Martian player puts all his Scutatores (heavily-armored melee types) into one big squad, reinforced with the Triarch and the standard bearer.  He hides them behind a mesa for counterattacking.

That's a lot of colonists.

The Colonist player puts three squads on the flank opposite the crater.  They will make the main push.  He puts a fourth squad to threaten the ruins.  He doesn't really expect them to take it, but as long as they are there, the Martian player can't move his squad out of the ruins.  The Colonist has two mortars as support weapons.  These he also places to attack the crater.

The game begins.

The Colonists advance, and the Martians shoot them up.  There are plenty of craters, so casualties are light.  However, the Martians target the Mortar squad and keep it pinned for several turns.  Once the Colonists have advanced their guns into range, the LMGs remain stationary and the riflemen continue the attack.

The Martians defend.

Eventually, weight of fire whittles down the Martian squad in the ruins.  The mortars unpin and utterly devastate the squad in the crater.  It fails its break test and flees the table.  It looks like the Martians are going to lose.

The doomed crater defenders.


 Still, the Martian swordsmen are intact.  As soon as the Colonists are in range, the Scutatores rush up.  They use their doctrine to protect themselves in Firefight, then charge.


Charge!

The Scutatores chop the crap out of the Colonist's squad.  Then they scoot back behind the mesa.

They slice!  They dice!


They retreat!

It now all hinges on whether the Scutatores can swing around the Mesa and contest the two Colonial squads that have lined up in the bloody crater around the Objective. 
The critical counter-attack ...


The final firefight goes poorly.  The combined Colonial squads (together with a crapload of LMGs) force enough casualties that the Scutatores break.

... gets shot in the face.

The game ends.

My impressions:  the Scutatores are pretty awesome, but there were just too many Colonists for them to kill.  I like the basic mechanics (and I fixed a few bugs) but I think I need to work on the balance of forces and their size.